

How To Make Animated Sprites In Photoshop
Create an animation using Photoshop and After Effects
In this twenty-four hours and age with all the whiz-blindside 3D voodoo sloshing onto our televisions I sometimes miss the golden era of hand drawn animation. Everything just seemed and then much simpler, no ambient apoplexy, crash-land maps or render farms. When I was asked to animate a monster illustration by Jon MacNair I idea it would be interesting to get back to pens, papers and the imagination.
Luckily, these days we have the benefit of modern software that we can combine with the practices of yesteryear. Animating Jon's dragon beast, I'm going to make it do a signature roar movement using a technique that I used when creating a mitt animated short for the Bare Bones Gallery.
I really want to become beyond the personality of hand fatigued animation, along with the textures which requite the work its await and feel. To achieve this, the Animation feature in Photoshop is a godsend. Inside this tutorial I volition prove you the basics and so y'all can venture along and create your own throwbacks to a bygone era.
- Software: Adobe Photoshop & After Effects (CS5-CC)
- Skills: Setting up Photoshop for blitheness, using the onion-skinning feature, making a line test
- Download the back up file here
Step 01
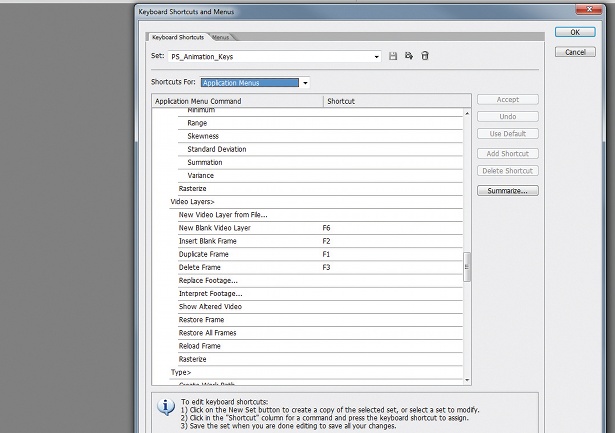
Earlier launching into animating you need to setup your shortcuts. Press Alt+Shift+Ctrl+K. I've used the following settings for this tutorial, but feel free to use what'southward comfortable for you lot:
- Duplicate Frame: F1
- Insert Blank Frame: F2
- Delete Frame: F3
- New Blank Video Layer: F6
- Next Frame: Ctrl/Cmd+fullstop
- Previous Frame: Ctrl/Cmd+comma
- Onion Skin Options: F5
- Enable Onion Skinning: F4
Step 02
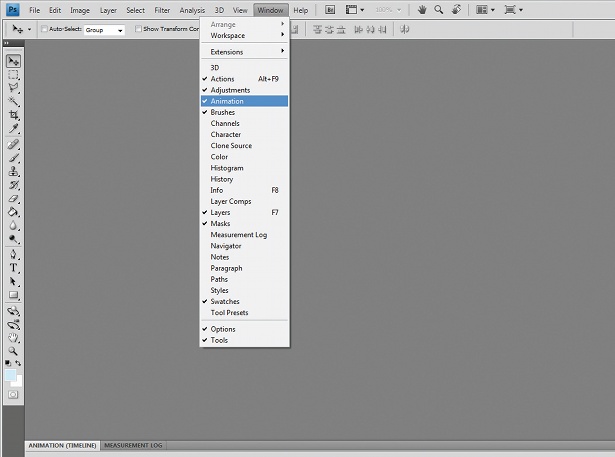
Now we accept the keys fix upward the next step is to get to the animation mode. To show the animation timeline go to Window>Animation, and make sure there is a little tick next to it. Now a big timeline should appear at the bottom of your Photoshop window.
Step 03
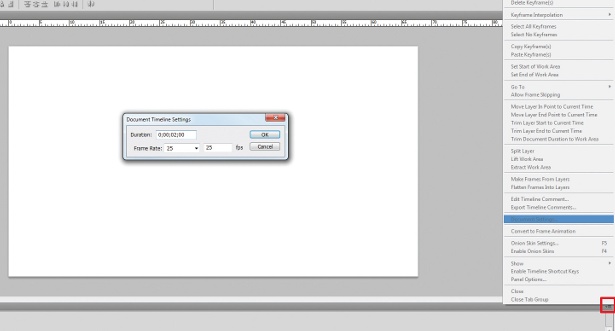
Now open a new PSD. From the drop-down menu select Film & Video and click 1 of the presets. Here I've used 1920x1080; TV is always 72 DPI. If you desire to change the length or FPS click the bill of fare icon upper right of the timeline window and click Certificate Settings. I've set my timeline to 2 seconds length at 25 FPS.
Step 04

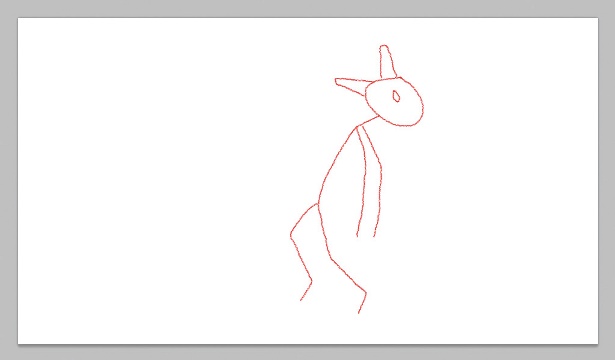
Earlier you starting time going to town it's proficient to make a elementary guide animation, or a line-exam. This involves unproblematic lines and shapes in a quick-to-describe rendition of what you want to animate. Information technology helps you with timing and getting the motion right and so you don't spend an historic period drawing an animation you aren't happy with. Simple and quick is the key - hither I've just fatigued a stick figure to stand for my character.
Step 05
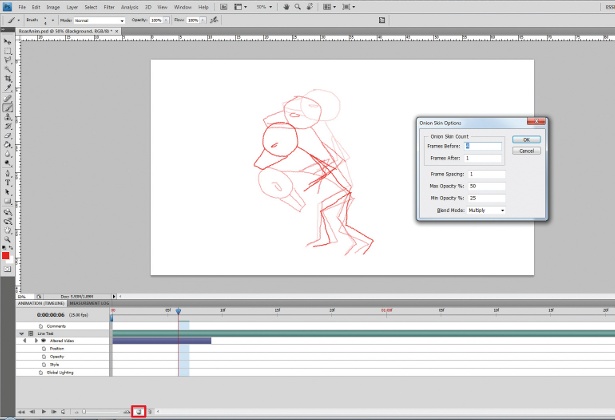
Let'southward animate the line-examination. Make a new video layer (F6) and describe your stickman. When fix press F1 to insert a new bare frame. To enable Onion Skinning press F4 and to modify the options press F5. Onion Skinning allows you to overlay your previous and/or adjacent frame. When happy with the settings redraw your character and press F1 to move onto the next frame. Nosotros've started animating!
Pace 06
Continue animating your line-test by drawing, pressing F1, redrawing, pressing F1. Information technology will be time consuming, only information technology'southward worth information technology. In the instance I animate a ii-second clip, but this may vary depending on what you are animating. If looking at the RoarAnim.psd you lot'll also detect that I've simply animated every other frame. Information technology's quite normal for hand-drawn blitheness to be made at around 12 FPS, otherwise it would have fifty-fifty longer.
Step 07
When you've finished your line test you can play it back to run across how it works. To do this, either press Spacebar or click the little Play push lower left of the timeline. On first playback it might not be playing at full speed - y'all tin can come across a pocket-size FPS indicator next to the timecode. Requite it a few loops of the animation to load into retentivity and so it should play back in real-fourth dimension.
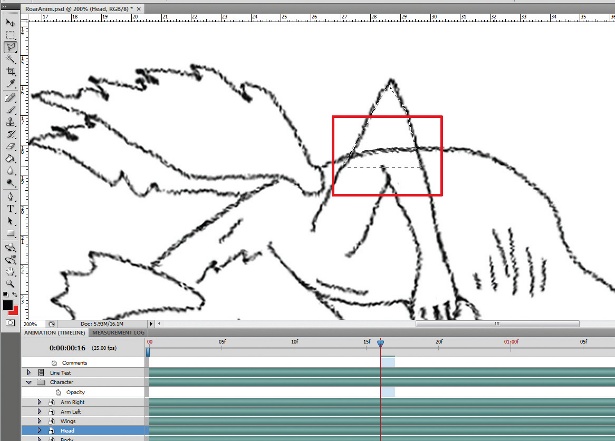
Step 08
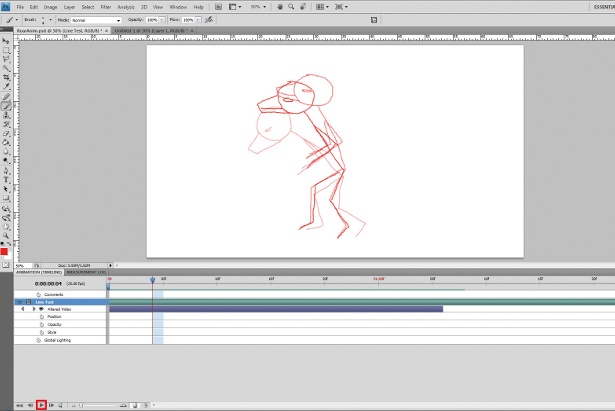
Happy with the movement and timings? Then it's time to flesh out the basic! Create a new video layer (F6) and become to the start of your timeline. The idea is to employ the line-test layer most every bit a skeleton for your character to be drawn on pinnacle. Hither you lot can see my simplified rendition of a character from Jon MacNair's analogy.
Step 09
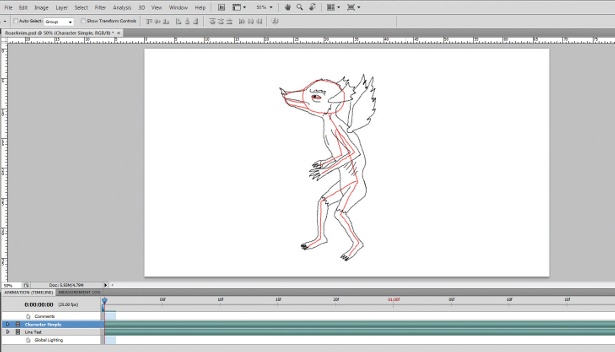
While you can keep your character all on merely one layer, I find my brain copes a little amend if I carve up things up a bit. You can see in the example that I've used unlike layers for various trunk parts. It also means that if a function doesn't need animating and so I don't have to keep redrawing information technology, which saves time.
Step 10

Go along the timeline cartoon your graphic symbol, using your line-test as a guide. The technique is the same as before: draw your frame, F1 to brand a new frame, repeat until the end of the timeline. Go along playing the animation back every now so to check how the movement works and that information technology'south looking good.
Step 11
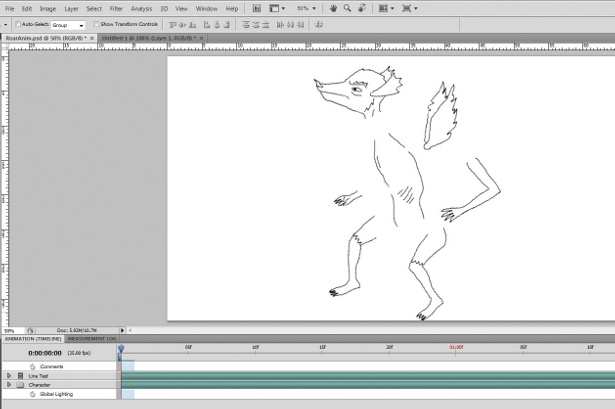
When I'thou cartoon my animation I normally ignore whether it should be in front end of or behind an object, I like to get the blitheness right before correcting that. Once I've finished the animation I will get dorsum and, using the Eraser or Selection tool, remove all the unwanted lines to brand limbs appear solid, as they should be.
Step 12
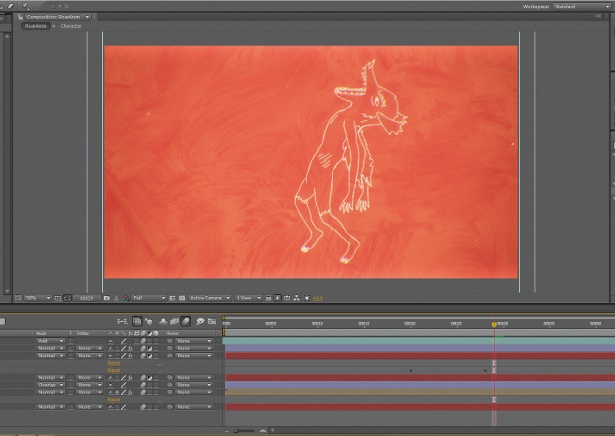
Afterwards the animation is all finished you lot can import it into After Effects if you want to brand it look a little more polished. Adding a bit of noise, texture and grading can actually make your animation stand up out. Although, having said that, I wouldn't arrive likewise polished as I find the imperfections are actually what requite your blitheness some personality.
Also read: How to motility from Photoshop to Subsequently Effects
Liked this? Read these!
- Free Photoshop brushes
- Free Photoshop deportment to create stunning effects
- The best Photoshop plugins
- Download gratis textures: high resolution and ready to employ now

Thank you for reading v articles this calendar month* Join at present for unlimited access
Relish your showtime month for just £one / $ane / €1
*Read 5 complimentary articles per month without a subscription
Join now for unlimited admission
Try first month for just £1 / $1 / €one
Related manufactures
Source: https://www.creativebloq.com/create-animation-photoshop-and-after-effects-5132655
Posted by: hardinhiplent79.blogspot.com
0 Response to "How To Make Animated Sprites In Photoshop"
Post a Comment